Cyberpunk Challenge - Part 02 - Figuring stuff out

General / 29 February 2020

Heya!

So I thought it was time to write another blogpost regarding what I've been doing lately. So generally I haven't spent too much time on the Cyberpunk scene, I've just been doing small stuff here and there that I've found fun/interesting since I've been somewhat swamped in work and other things BUT I have made some things but first up:


More information about my scene

  • It's completely rendered in real-time in Unreal Engine 4.
  • It's real time dynamic lighting, no RTX-features.
  • I'm going for a stylized look. (influenced by animé) I don't want to make it realistic.
    • Character is cel-shaded with no baked textures, only colored polygons.
  • I'm currently not doing any heavy production workflows, ie no high-poly/low-poly baking etc etc.
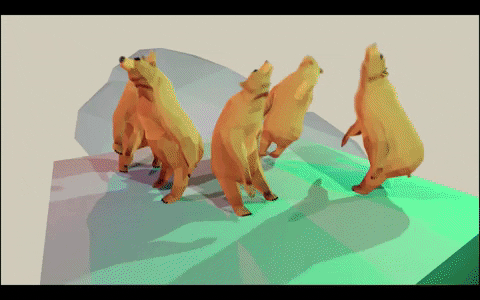

Flying Cars VFX 

- Mesh Emitter + Lens Flare

What it does is take any mesh you feed it and emits them as mesh particles. These have an attached lensflare to them as well and they just push them in a certain direction. It's probably the easiest way to go about this type stuff.

I also have lightning strikes going on around the scene with a big light to add more to the mood of the scene.
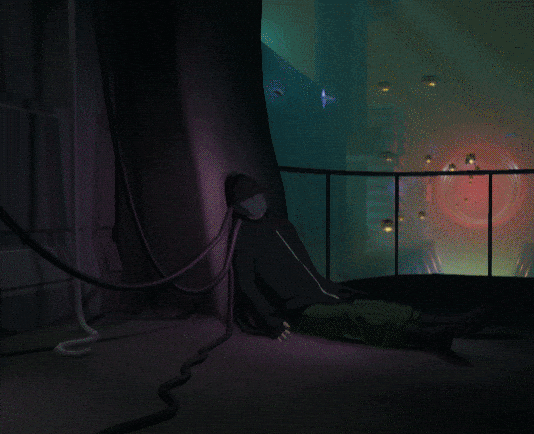

Cable Physics

Physical cables that have a start-point and an end-point. They conform after the COL-geometry around them.
Makes it easier to get natural looking cables hanging and lying around. For more elaborate setup a mesh-spline is probably the better choice.


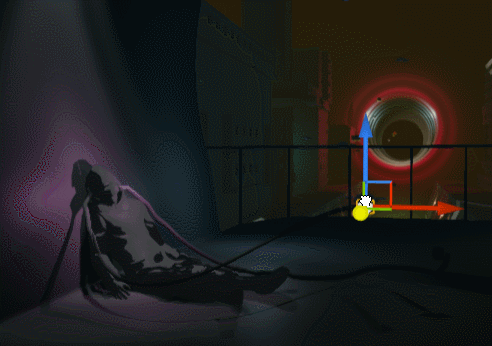
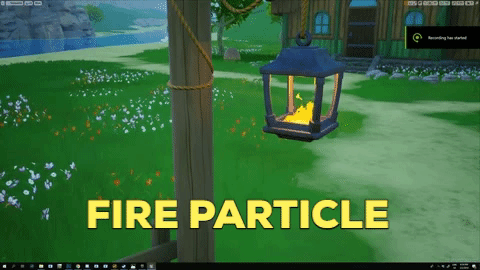
World Location Pulse Emissive

I've used this before, this world location pulse is a material-function that I can plug into post processing, materials or lights. It allows me to set a point in the world and have a pulse-be generated from that location . That pulse I can use as a mask to do different cool things. It's sometimes handier to use if you need a pulse originating from a location spreading in all directions.
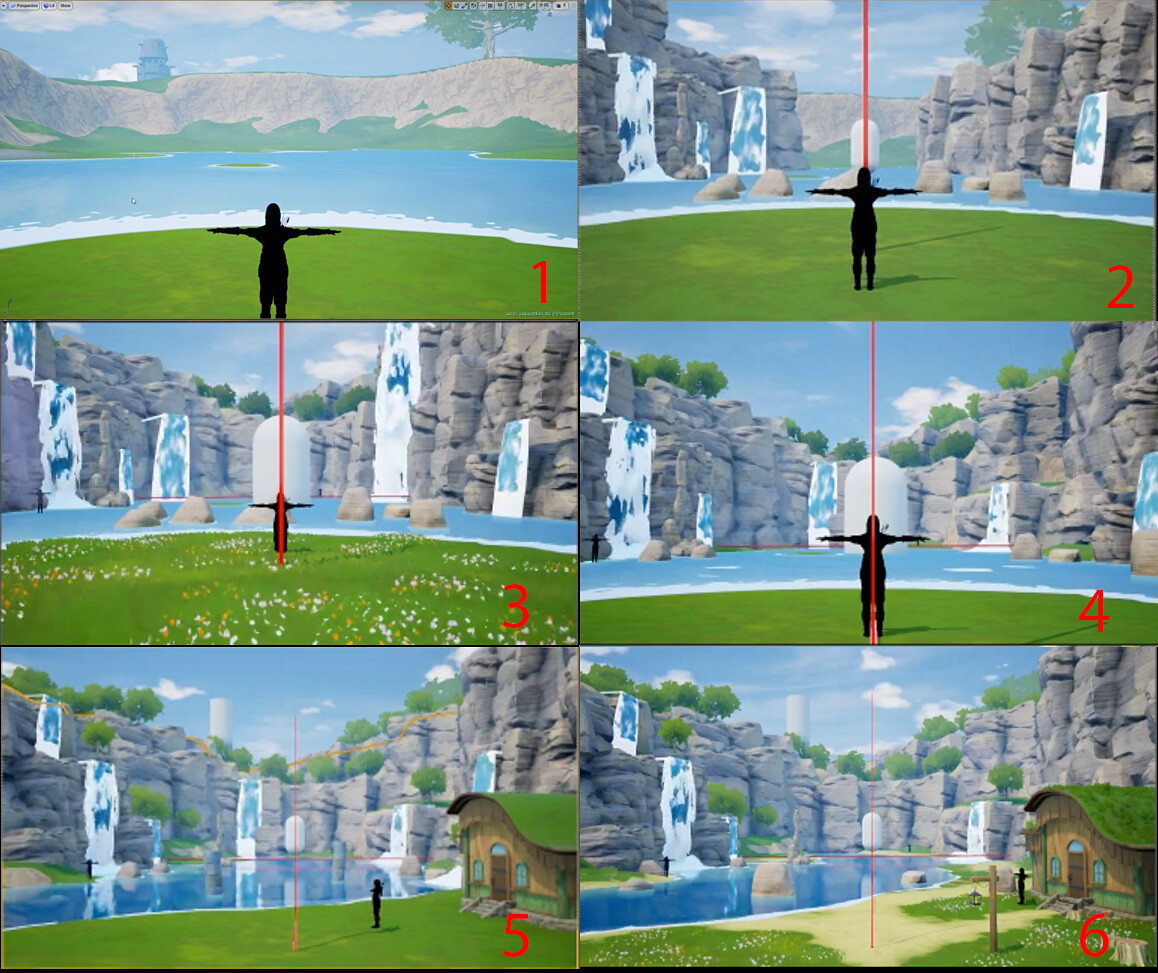
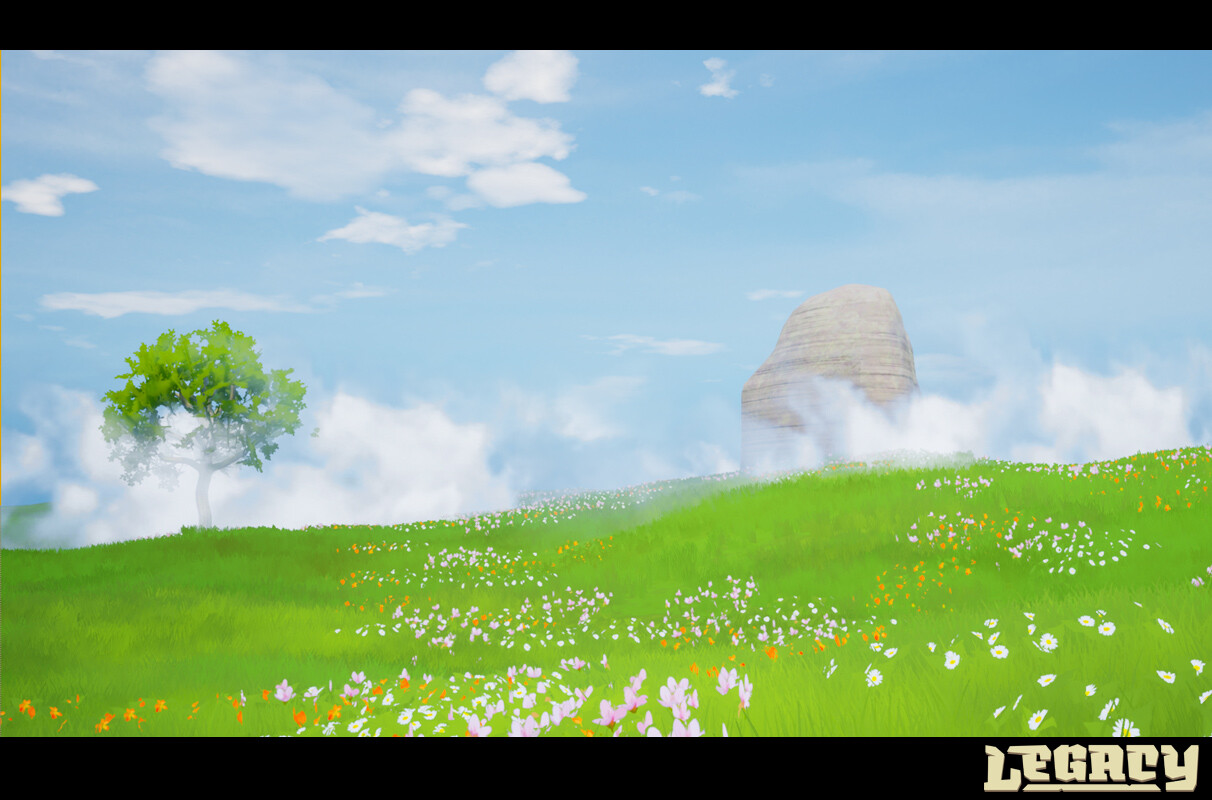
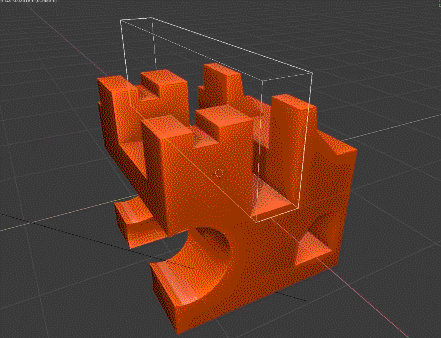
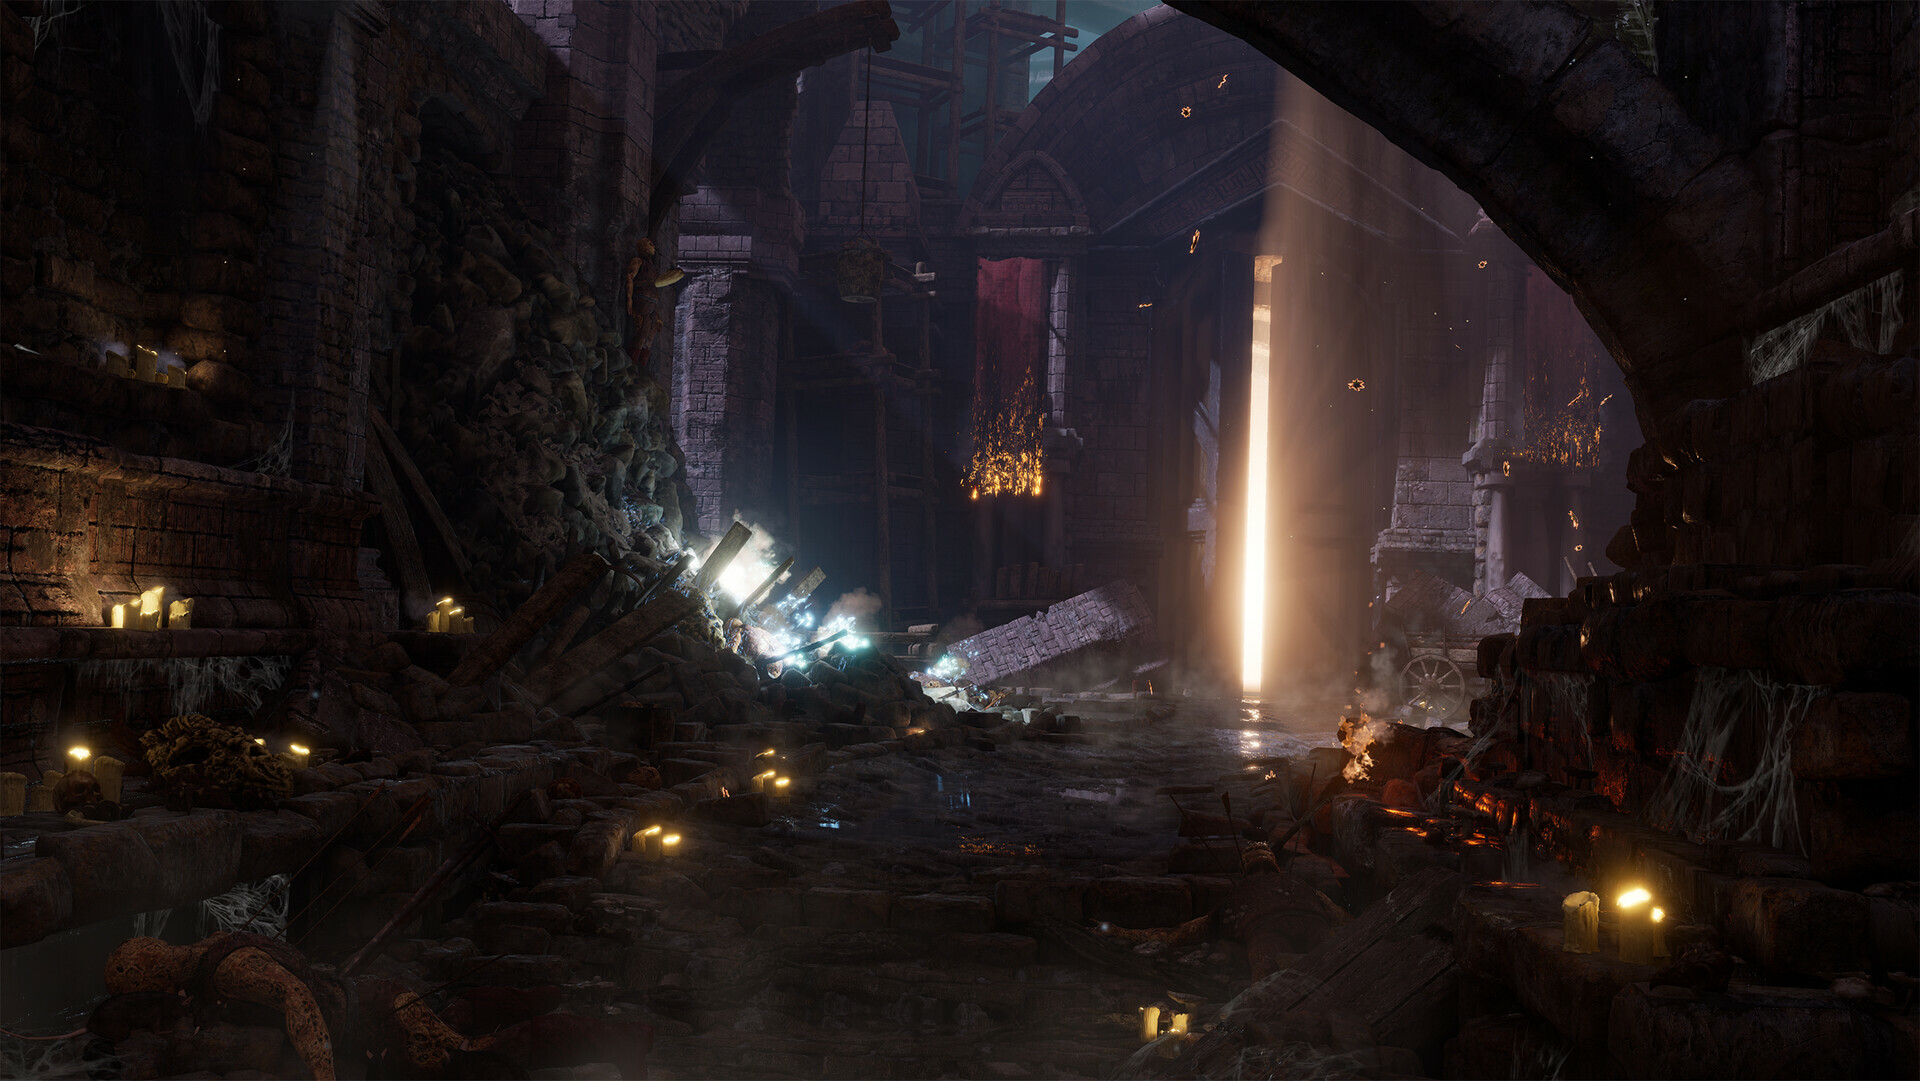

Progression shot

So I decided to show progress from even earlier stages of my blockout, my first post showed a couple of shots in since I felt like there wasn't really much to show at the moment but I also thought that some people thought appreciate to see the whole thing. So with every blogpost moving forwad I'll show the full progression.
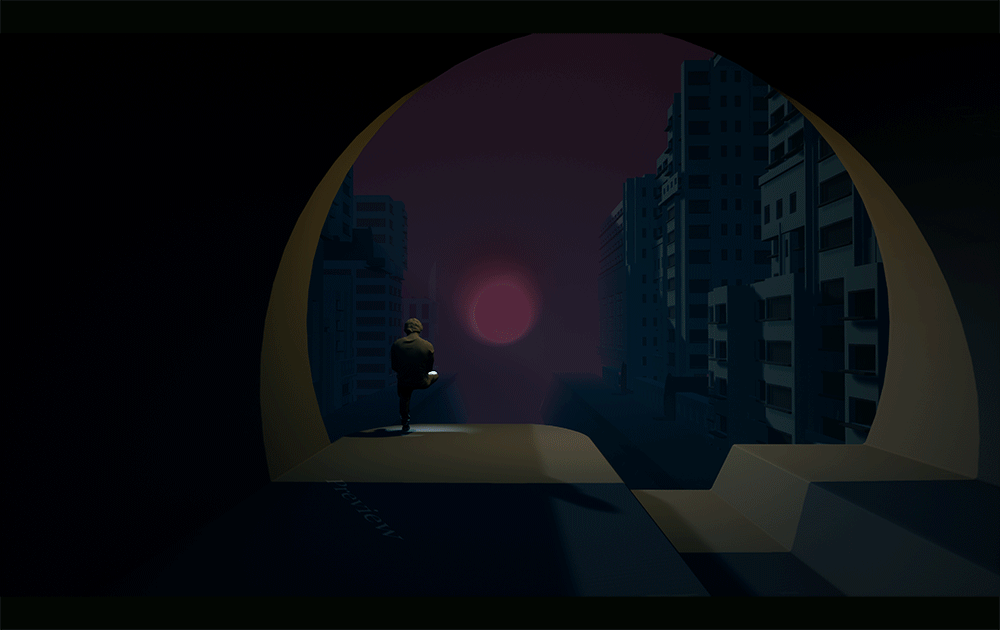
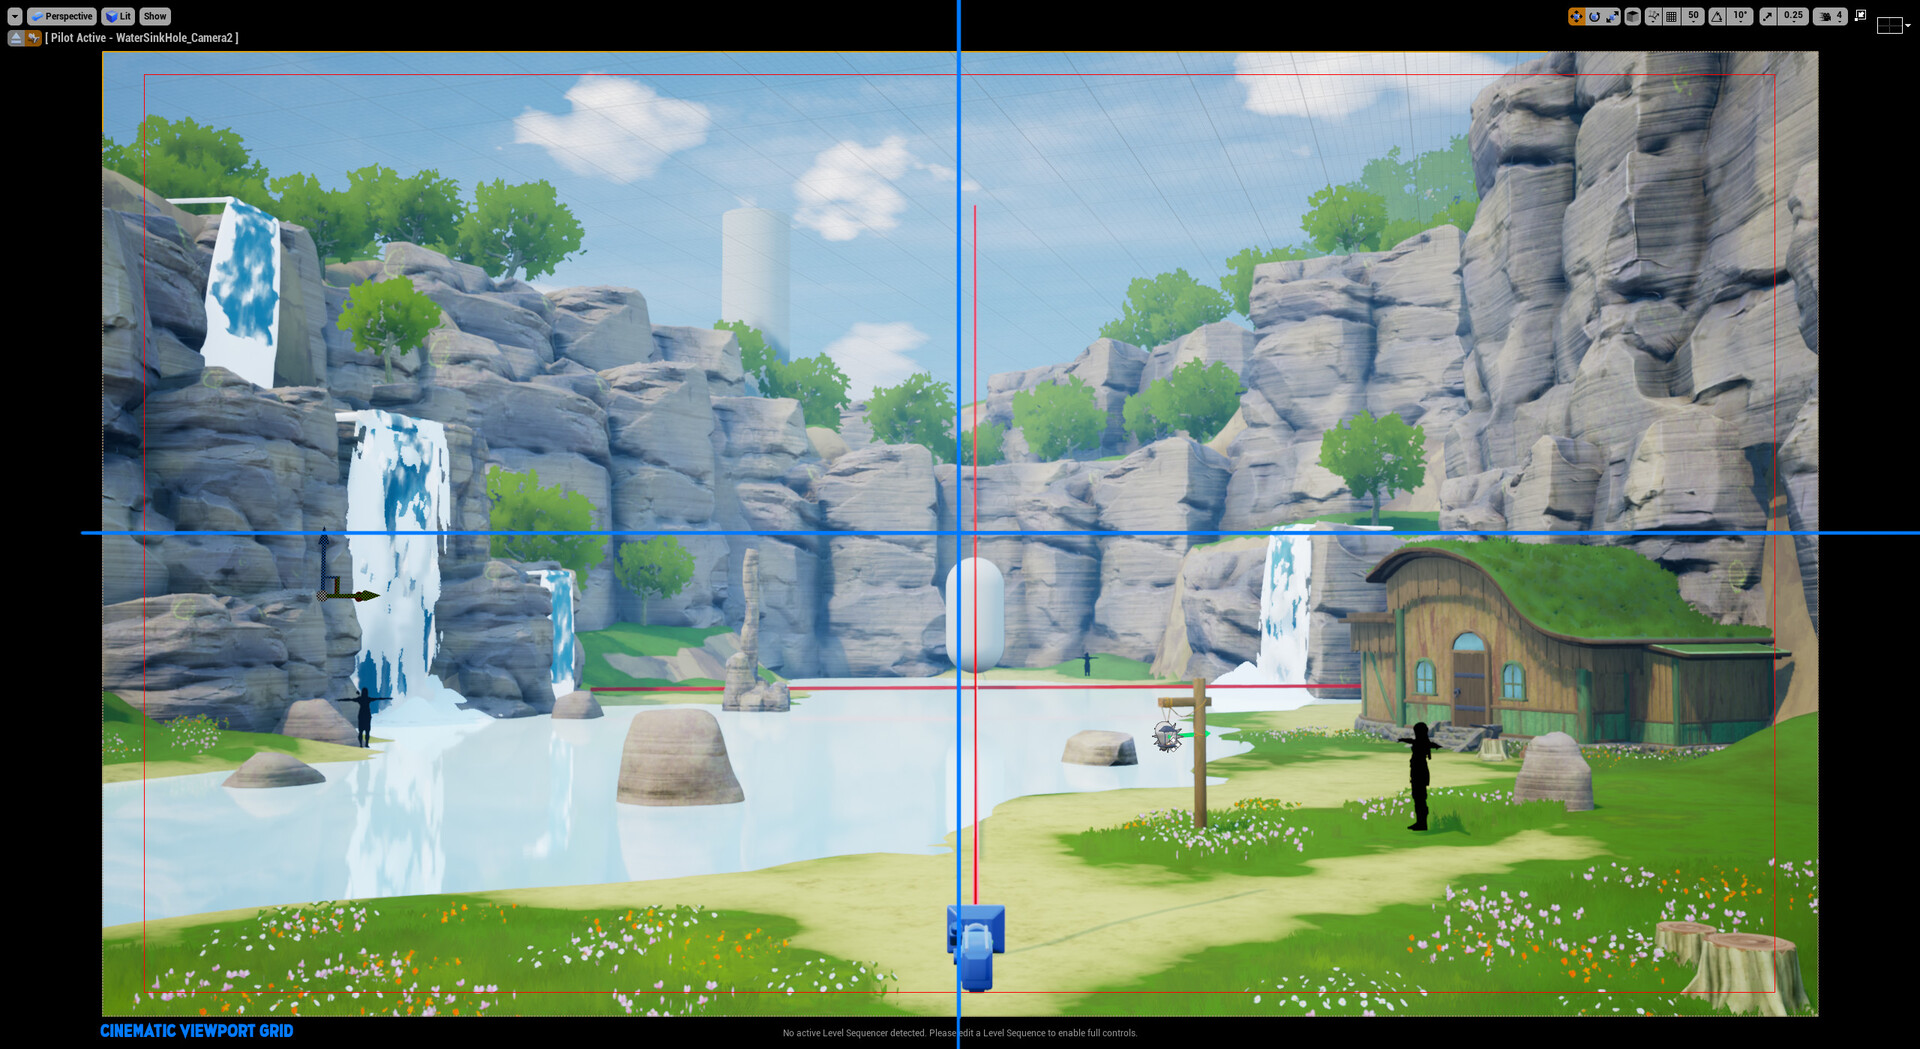
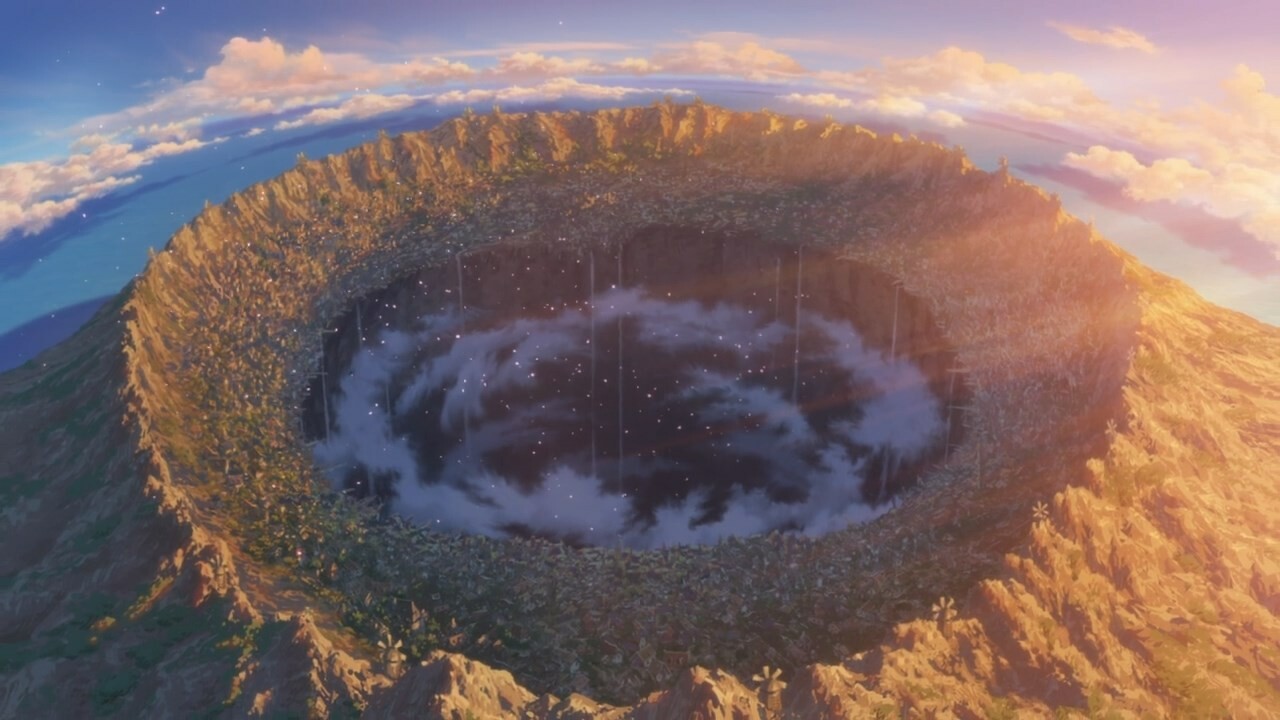
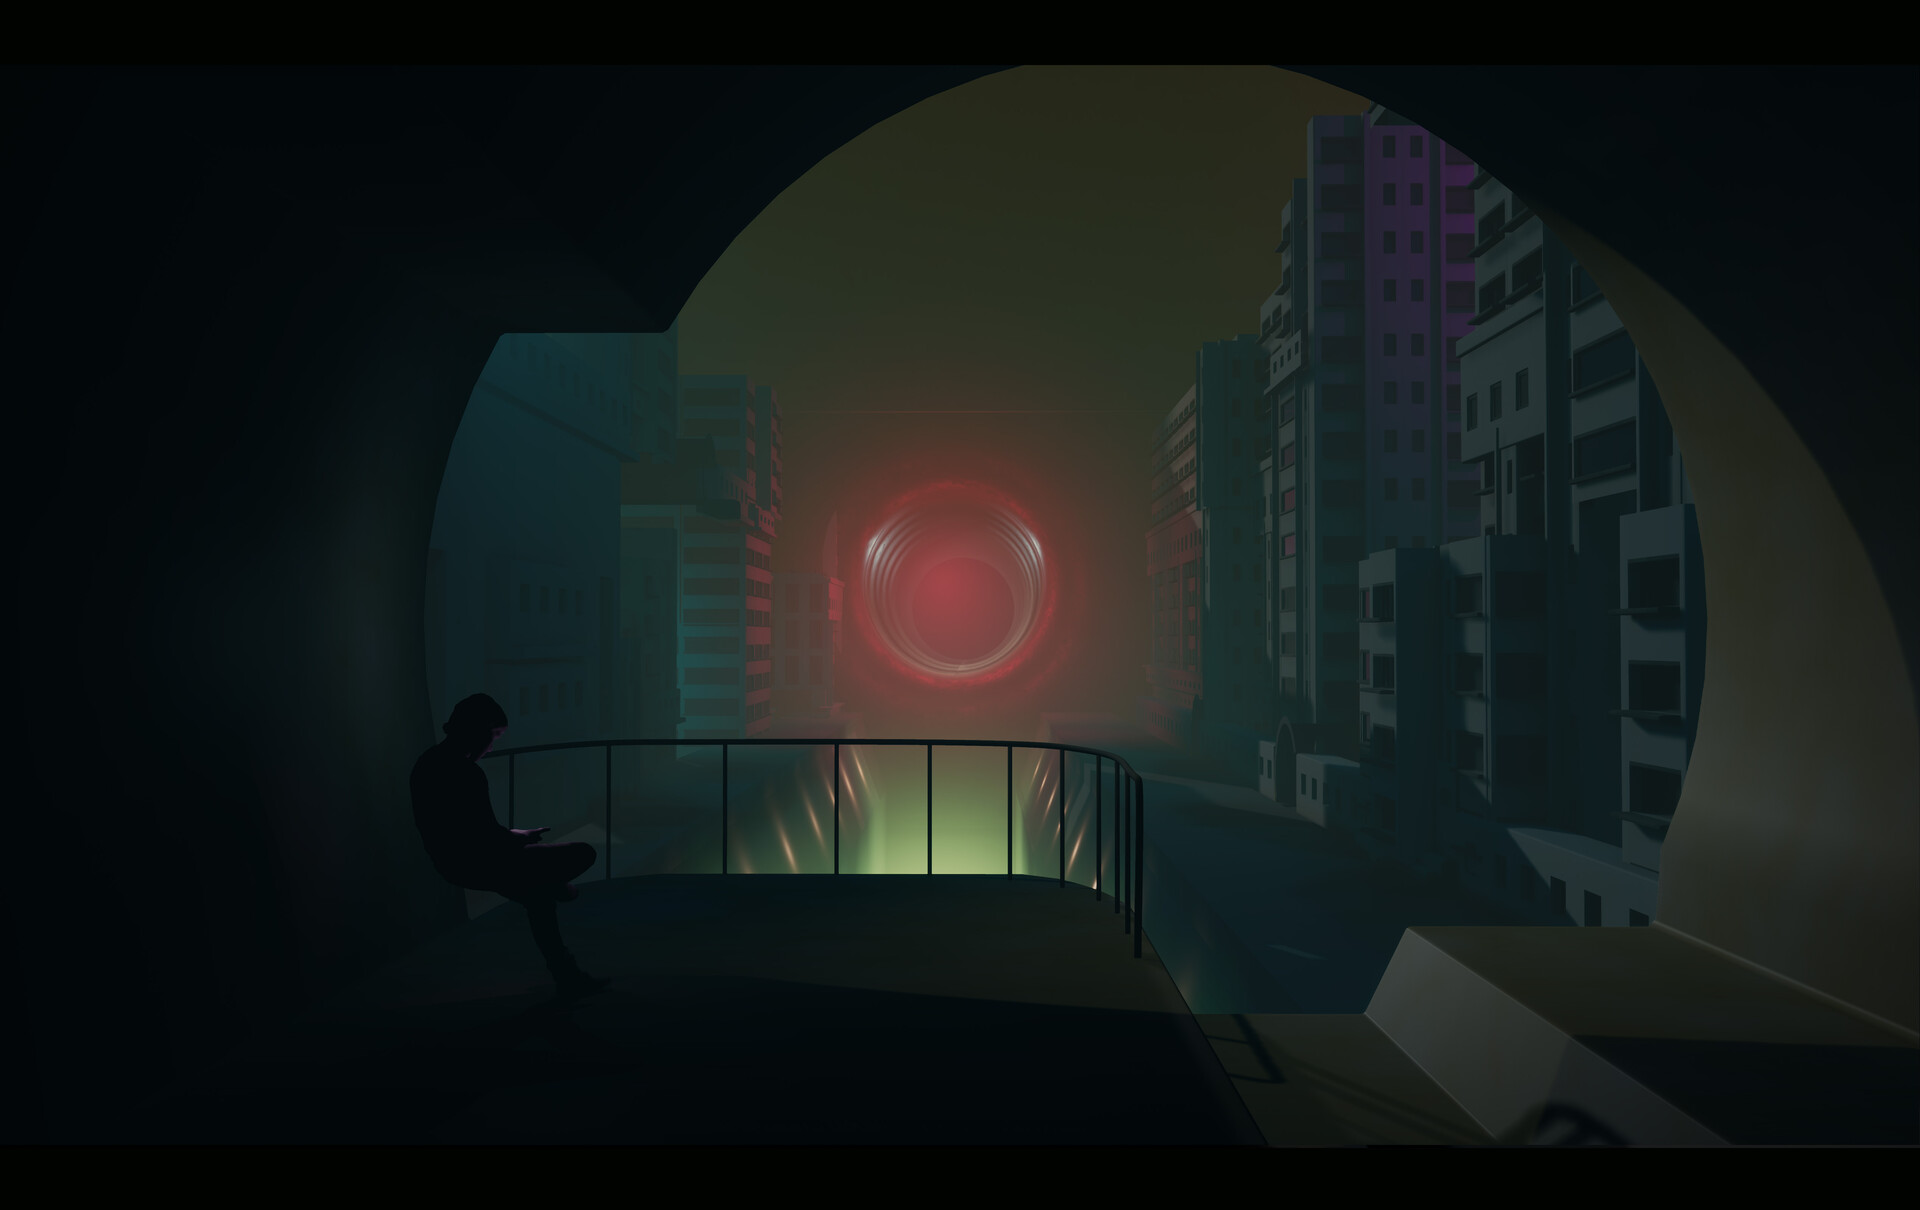
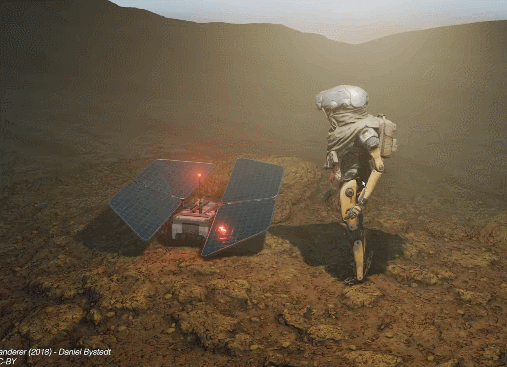

Latest Shot

Below is the absolutely latest video-shot of my scene . I still have lots to do but I'm trying to take it easy and not kill myself.


"


A "short" list of stuff I still have to do.

  • Fix the scale issues I'm currently having, need to re-adjust things now that I've decided to show more in my scene.
  • Add more opportunities for story-telling in the foreground and don't be afraid to change things up to make it look more interesting.
  • Probably add rain or something else to increase atmosphere and mood. My only worry is that it might end up too noisy.
  • Figure out a better design for Character Helmet
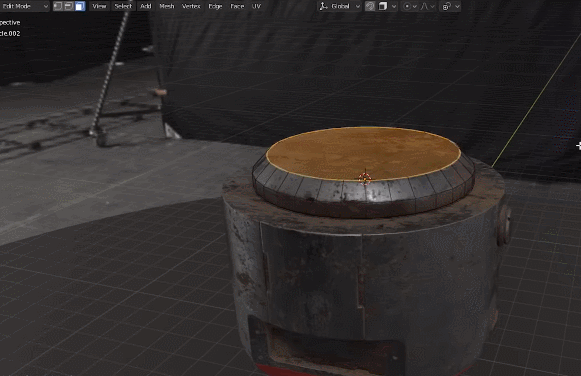
  • Figure out a better design for the power-generator he's jacking into
  • Add more detail to the foreground sewer opening
  • Add more detail to the circular opening in the background
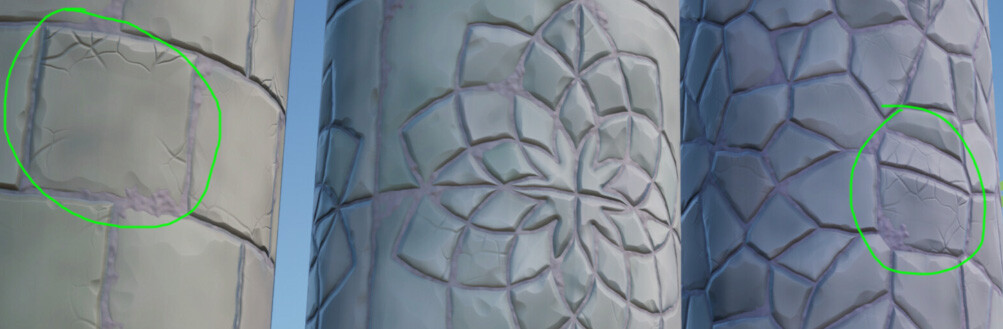
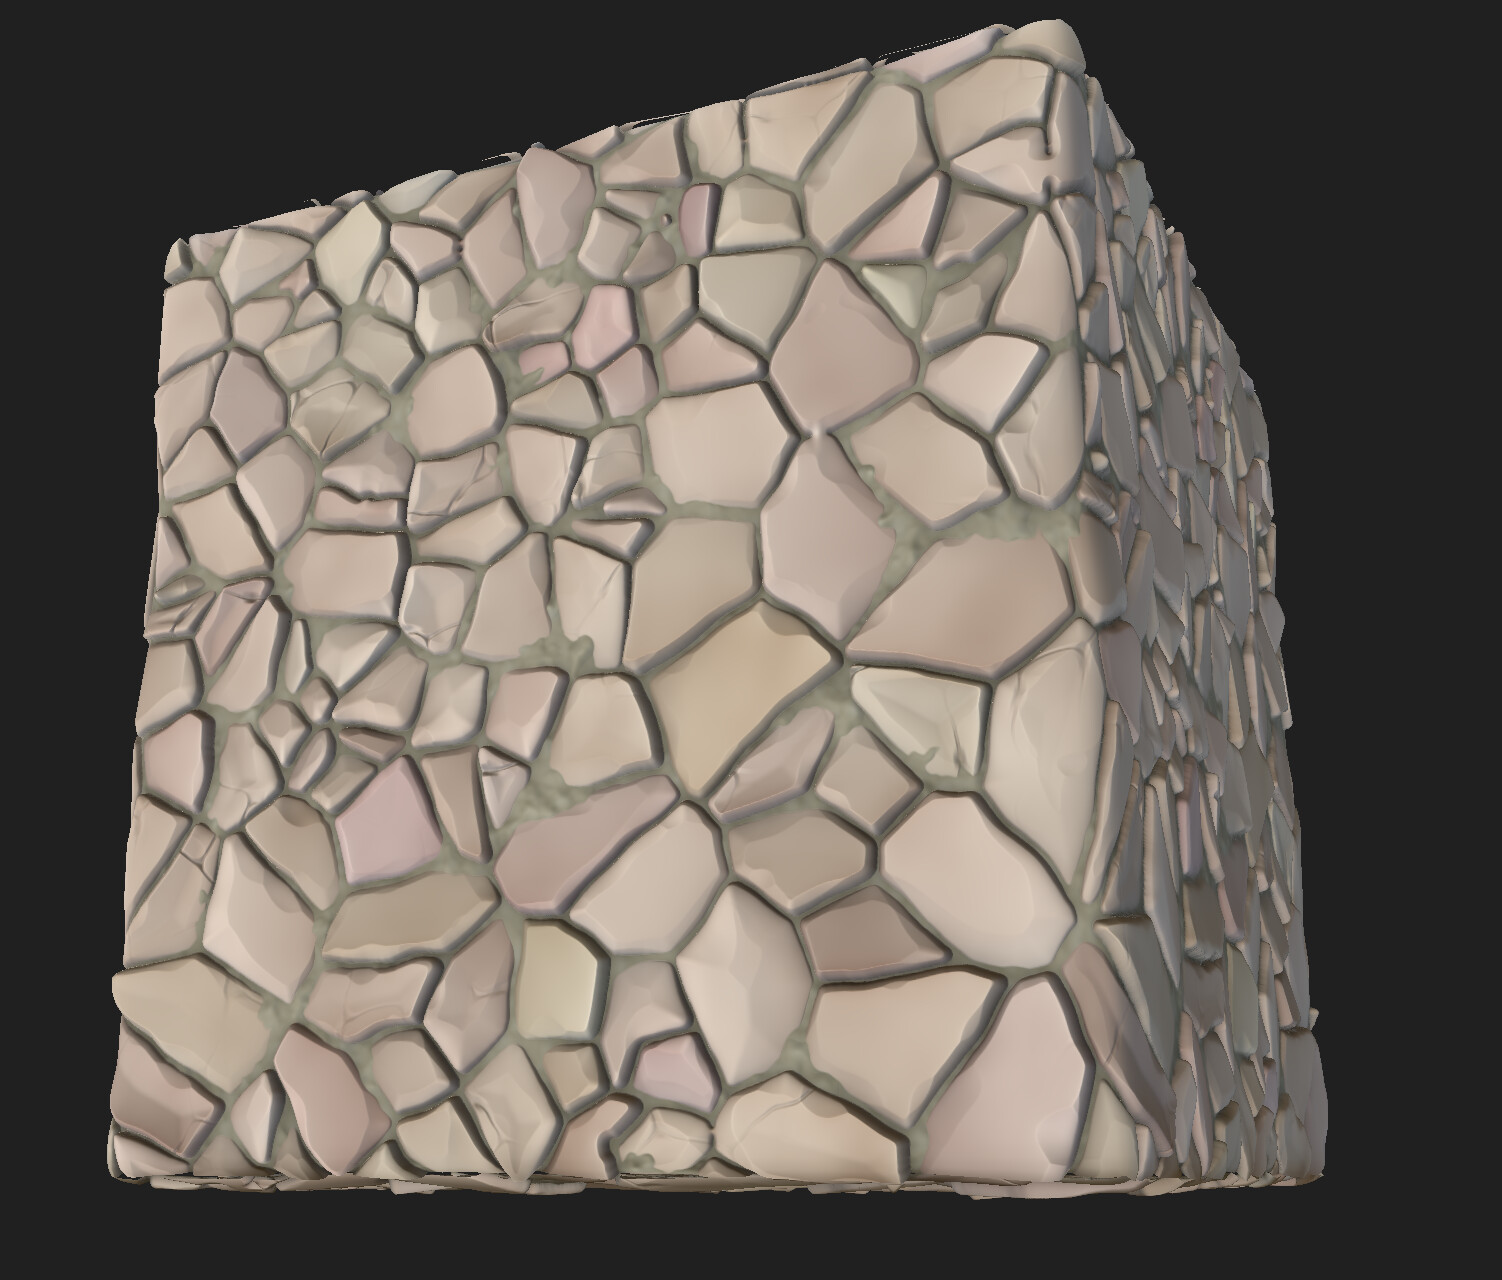
  • Actually do a pass on the buildings
  • Add huge power-lines from the green area below leading to the circular red shape.
  • Figure out VFX for the power-lines.
  • Add more car variations to the Flying Car Mesh Emitter.
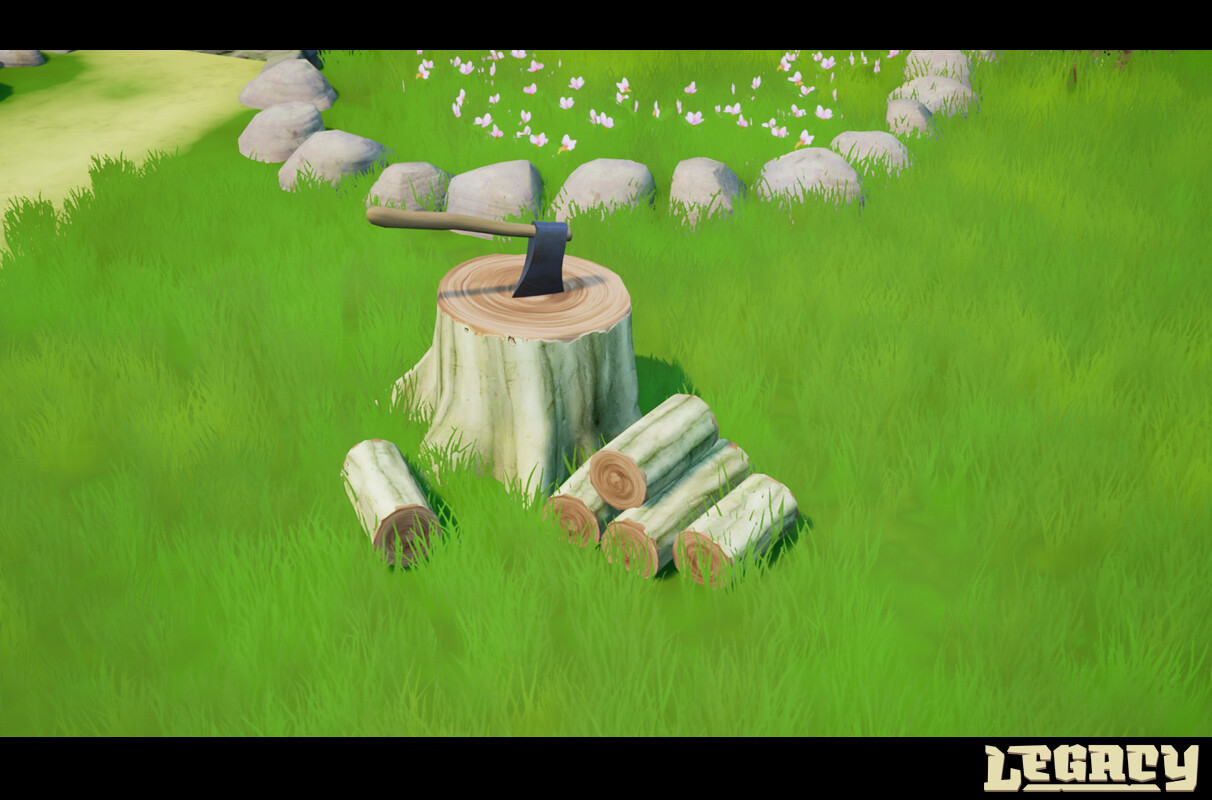
  • Make small detail props to place around the foreground


So there you go :)
If you have any questions let me know!

Warping out!

/Chris Radsby
  

Cyberpunk Challenge - Part 01 - Getting started

Making Of / 17 February 2020

Hey guys!


 I thought I'd get started doing the cyberpunk challenge as well. To join the others in the community trying to create kick-ass art.

My reference board is similar to everybody else I would believe. I'm doing asian inspired stuff, especially Hong Kong. But since it's so early days I haven't really spent enough time looking into the exact look that I want.


I don't really have any compositional refrerence right now and kinda just going by what I feel looks good for now ^^ Though I bet that during the time of the challenge things will quickly change.

So I decided to not do a blog post until I got at least a decent blockout up and running, so this is what I've got so far.  I'm going a very different direction from many of the others I believe. I'm going to lean heavily into stylized rather than go fully realistic. I'll still have realistic shapes but I just want the whole thing to be very artistic and stylized across the board.

I'm currently using only dynamic lighting, no RTX-features at all.


So yeah, until next time! Hopefully I'll be able to spend a couple of hours each night on this but we'll see :) Between work, getting fit, mentorship and gaming it's kinda hard to get this done haha. Gotta keep up with the youngins eh!?...I'm not that old.

Oh well, until next time!

Warping out!

/Chris Radsby

The Value of Mentorships

General / 17 January 2020

Hey Guys!

Lately there has been a lot of interest in me and the Mentorship I'm running over at The Mentor Coalition.

EDIT: I'm currently not running a mentorship at The Mentor Coalition. If you're interested in me mentoring you and teaching maybe consider my patreon? https://www.patreon.com/chrisradsby but also you can contact me here on Artstation and we can talk about things and potentially set something up!


It all started with the most humble and awesome Stijn Van Gaal and the Article that he wrote for his fantastic Italian Alley piece.

Coupled together with Kieran Goodsons lovely blogpost it's been a lot of great impressions of my Mentorship out there which is great!

The thing I would like to really highlight though is that even though guidance is really valuable, speed you up and can really help you get to the next level, it's really important to remember that these guys have invested a lot of hours into their craft and in my opinion,  Deserve All the Praise generated from this type of attention.

Now I don't mean to undersell myself in anyway but it's important to remember that:

Progress = Time Invested

None of their successes would've come if they didn't work spend the time on improving and that's the stuff you don't see everyday when you browse artstation, or browse social media and see updates about other peoples successes. The blood sweat and tears. Which again is why I want to make sure to highlight this:


I can only show you the path then it's up to you to walk it.


And this is true for all forms of Mentorships or Coaching. It's never easy but you have to be very critical of your own work, be willing to listen and take instructions to make the most out of Mentorships. It can be very rough for people sometimes to learn their weaknesses and be told to deal with them. But generally speaking with your Mentor about these thing is exactly what will help in understanding how to improve.

Ultimately the difference between the people who succeeds and don't is the amount of honest time spent put into their craft. The seriousness they bring every day to their workstation.

Becoming professionally skilled in your craft needs you to bring a professional attitude towards your craft.

It basically means that, by having a professional attitude towards your craft you take it seriously and thus schedule your art-time. You make sure you leave room in your day to improve your art and you tackle it with a professional attitude.


The Bar for Quality

Alright so let's talk a little bit about the bar of quality, in Kierans excellent blogpost you can see some of the bar that is needed to get hired in this industry but It's also important to realize that the skill-level even between these projects are vastly different and I think that applies to all of us: We're all better/worse at different things however you need to reach a certain bar to start being considered on a professional level.


Let's use this quick mockup that I made of a Radar-Chart Diagram

A mentor can help you guide you improving your strengths and deal with your weaknesses, it's generally not something you get taught in class or even easy to learn from community-based learning. The main problem is gauging where you are currently at, and what areas you need to focus for the biggest impact in your art.

Looking at all the juniors getting hired they are all good at different things but they all have achieved professional level in most if not all categories.

There are some exceptions to this, an overabundance of one thing might actually make up for the fact that you're lacking somewhere else and if I were to spend some more serious time into this then you could make charts for different companies values. All companies have different requirements or things they value.

Me as a Mentor/Person I value:
Hard Work, Creativity and Artistic Skill more than I do World Building, Technical Skill or Asset Execution Skill.
Because some things are easier to learn than others.

The Importance of Community

I've always though that some of the best ways to learn is to engage with a community trying to climb the same game-art mountain as everybody else. I think this is the most valuable type of learning you could do for yourself, is to join a community with like-minded people , all trying to improve together.

The major pluses being that they help you learn, let you know your weaknesses and you become friends with amateur artists and professional artists all over the world.

Both the Dinusty Empire and The Mentor Coalition have fantastic discord communities where you can share your art and learn from other like-minded people.

Mental Health

Coupled together with Hard Work , seemingly impossible high quality bars for Art it's important to remember that your own mental health is really important. Which is why I'd like to also highlight it as an issue in this industry as a whole. When decide to engage in projects with the intention that the project is supposed to get you hired it's important to actually choose the right type of project to do and learn better ways to be more efficient.

This is something you can learn but it's also something that a community or a mentor can help you with.

Not all aspects of your Art has to be perfectly executed. 

There are shortcuts that are valuable time-savers and sanity checking your production times is a good way to realize if you will be able to make it or not. Ie if you have a 100 assets to make for your scene and you spend at least 3-4 days on each well then you still have 300-400 days worth of work ahead of you and it's enough to make anyone go insane.

Take care of yourselves, the industry can sometimes be harsh enough even without you putting all that pressure on yourself because the scope was too big :)


Alright, I think that's enough for now :) Don't want to badger you guys even longer.

Left in Space - SolRemix Entry

General / 01 October 2019

Hello! 


Quick update , I decided to join the Nvidias #SolRemix contest last week. However I realized I would only have 3 Evenings worth of work time on it since I was going to spend Friday to Sunday Midnight in Stockholm , so I decided to do the best I could make in the time-span.


The final result is this image & video:


I've had a couple of questions regarding the work as well. It's massively inspired by Halo and Mass Effect, both worlds have had a massive impact on my art and my life in general so it felt right to do a space setting for the entry. I also chose the space setting because of the time-constraint, I needed something that was very quick to make without getting bogged down in Asset Production.

  • The planet itself is not made by me; it's by this wonderful person:
    https://www.unrealengine.com/marketplace/en-US/slug/physically-based-earth 

  • The scene is dynamically lit in UE4, no RTX-features enabled.
  • I'm making heavy use out of the volumetric and I'm actually using black fog in this particular scene with colored lights
  • The character was provided by nvidia and their SolRemix Competition
  • All of the video & audio editing was done in UE4 sequencer.
  • All of the meshes are low-poly and using a Black Material with no Specular (Silhouette Material)
  • The music is made by C21FX - AFTER THE FALL

I guess that's it, if you have any questions please ask away :)


Taking the leap - The Future of 3D

General / 05 September 2019

Hey There!

Again! It's been a while since I wrote here. I've gotta be honest not much has happened on the legacy project front. Lately I've felt that I've needed to spend more time doing other things but now that summer vacation is over I'm slowly moving back towards getting some art done during my evenings.

I guess it's also worth mentioning that My Mentorships have started again and I've got 2 lovely people that I'm working with for September. 

It'll be really fun and I'm looking forward to their progress!


The Future of 3D-modeling packages

Professionally I've been working with 3ds Max , Maya and Modo, lately however I've only felt disappointment regarding the features implemented every year. It's easy to say that I'm probably not the only professional 3D artist that have been considering moving away from the industry-standard packages out there.  Max and Maya are packages that have been around for a really long time and have a lot of history but they have this looming feeling of "Set in its ways" and even "it feels old and legacy" in the way they do things. 

I'm the type of artist that tend to move packages when something new and exciting was introduced or if I had a specific need to learn something. My move from Maya to Modo was basically a way for me to start using a tool that was more intuitive and had less barriers when it came to modeling. I was really excited over the tools and what could be done with the rounded edge shader.

However, since I started using Modo very few features have been implemented that I've felt are relevant to the type of art that I'm currently creating.

Now looking forward, I think it's easy to say that all of us have been baffled by the amount of features and cool shit that has been coming to Blender.  

So at the end of the day I end up asking: 
Is it actually worth paying a monthly subscription fee for a 3d software that isn't really all that better than what Blender provides?

Well, I don't know yet, but I'm finding out. 

So I'm learning blender.

Now, it's not the first time I've moved on and tried mastering a new software. So I'm not completely new to this experience but at least I can tell you about my experiences in doing so. Looking at all the software the I've used I can quickly summarize what I like about each one:
(there are obviously a million things but I'll try to be quick about it) 

Max: 

  • Modifier Stack
    • Non-Destructive Workflows
  • Splines

Maya 

  • UV-Editor
    • Very neat UV-features
  • Outliner
    • Good way to organize things IMO.
  • Splines
  • Preserve UVs

Modo: 

  • Modeling Tools
    • Boolean Operations
    • Layouts
    • Easily Cut/Paste Meshes into the Mesh Layers
    • Workplane / Locator
    • Painting Selection, Pattern Selection and Lazzo
  • Rounded Edge Shader (Render)
    • Great for look dev and baking it down to textures
  • Intuitive
    •  Modo has a lot of functionality that basically knows what you want to do depending on the context. Basically making something in other software that would take several actions and bringing it down to 1 Action.


At face value I feel like almost all of the previous things I like exist inside of Blender or Blender does them even better.

Blender 

So what does Blender have that I'm interested in? 

  • Modifier Stack
    • Non-Destructive Workflows

  • Modeling Tools
  • Sculpting Tools
    • Generally feels more modern and better than what Modo currently provides.

  • Eevee Viewport + Cycles Rendered & Cross-compatibility.
    • Amazing viewport, lots of real-time functionality, volumetric lighting etc

  • Shader Editor & Grease Pencil

    • Procedural Materials (Real Time)
    • Rounded Edge Shader (Real Time)

    • Vertex AO Baking (I've been missing this from Modo for a long time)


  • Big Community, Lots of Tutorials and Videos
    • In comparison to Modo, Blender has a much bigger community. One was evident now that I was looking for Modo Sculpting videos and there plainly wrote "Modo Sculpting" into youtube and it showed videos from 5 years ago. Blender however has a sprawling community that provides not only tools and addons but also tutorials.

I'm not saying that the previous software don't have most or all of these features as well, I'm just saying they're very neatly packed into Blender but also completely Free and I believe it's worth having a look into =).

So what is actually Autodesk or The Foundry giving us that is exclusive or better than the rest ?
I'm not sure, but the more I'll use blender, the more I'll find out I guess but I'll be sure to let you guys know what I think.

Oh well, until next time!

Warping out!

/Chris Radsby

Creating a Series Pt 14 - Artist Feature & Desert Region Buildings update

General / 22 July 2019

Hello!

It's been a while since I last posted , I thought I'd give some updates on what's currently happening!
So I haven't really done a lot of work while I've been on "Hiatus" trying to relax, though I'm not sure I can call it that since I have still done a bunch of different art and tech related things.

Oh well onto this!
 This awesome artist over here Justin bought my artwork!!

Artist: Justin Myles Emerson

and he also landed a job working on Spellbreak which is super sick :) Well done Justin!

So what's happening with Project Legacy?

Well I've been doing some smallwork in the Desert Region, figuring out building-designs materials and colors that I like. I've settled on a mute grasscolor that I like that would allow plant and other things to stand out more with brighter more saturated colors. I still want the world to feel kind of primitive in a sense and then later on contrast it with some other hi-tech things but we'll see when we get to that :)


I also decided to surround the farming areas with walls, I realized however that modular walls wouldn't do so I decided to go all in and make sure I make use of mesh-spline instead. Wiggle wiggle!

Here is some of the composition work I'm trying out for the desert-region city buildings, so far it's early days but I like the look of it so far.

Procedural Foliage

So a while ago I decided to make sure I use the procedural foliage tools that unreal has and I gotta say they're very powerful. Though still have some quirks however, like, I would love if they could detect static objects and not place them inside of them. I thought that a solution would be to blueprint all my objects into groups and then have a foliage blocker volume inside the blueprint as well but nope.

It doesn't really work, so that one kinda went to the top of my priority list. Right now I've figured the best way to deal with that fact is to use bigger volumes to cover certain areas, then have other volumes with higher priority to do different types of vegetation + different blocking volumes in areas I want to do manual set-dressing.


 Here is a view from above in the grassland area so far, I've currently got trees growing the water areas since there are no fast and good way to add blocking volumes where I want them. I'm going to have to figure out some solution for that instead but for now it would just mean I would make sure the water bodies have their own volumes. The volumes being boxes however makes my life way hard. 

It's 2019 , polygonal convex volumes please!

More Gradient Mapping O_O

So in another test, I learned from my good friend Kunal (Tech-Artist) about Gradient Mapping that doesn't only take the U-axis into account but they V-axis of the texture as well. I used a 64x64 ramp texture (seen as a tiny pic below next to the text) to completely to create all the color variation of these textures here.

I tried it as a test to see if the workflow would be better. So what I concluded is that it's more efficient in terms of performance, however, much less versatile when you want to try out colors quick. The way it works is that it looks at two grayscale images (heightmap + modulation mask), one grayscale image basically reads what color it should be in the U-axis, the other grayscale image (modulation mask) reads from the Y-axis on the same ramp.

These grayscale images could potentially just be packed into one texture and then you could use different gradient ramps for all of your different assets.

Right next thing, character modeling & shading.

So I've also started thinking about what kind character I'd like to run around in the world with so I decided to start modeling a character to use. Right now the only thing that pops into my mind is this:

  • Androgenous look 
  • Masks that could have different types of decals carved into them.
  • Probably need something more interesting than a hood, probably need more of a headdress of some sort
  • Medieval Simple Clothing + Accessories to make it look more interesting
  • Simple Cel-shading without edge-lines


So I also did some lunch-time zbrush sculpting and quickly baked out a 256x256 texture in substance painter for this mask below. Since it's just a test I'm surprised how nicely and quickly this is to make these days. Since Procedural Texturing is a thing these days it also surprise me how efficient you can be going back and changing your HP and LP and the UVs and still bake it out and have everything textured immediately.

In the olden days if you changed the UVs you'd have to spend so much time fixing everything every time, these days it doesn't really matter if you've planned your procedural texturing properly and don't do too much custom masking early.


So what's next?

Well right now I'm just figuring and trying things out. I just started my summer vacation so you'll probably see some more blog-posts from me.

Oh well, until next time!

Warping out!

/Chris Radsby 

Creating a Series Pt 13 - Mentees & Desert Region Buildings Start

Making Of / 25 April 2019

Hello!

So it's been a long time since I last posted but some stuff has happened since then. Let me first say that I'm super proud over my mentees who've been outputting some really sweet art but also writing some 80.lv articles. They've been working super hard to get some art out there O_o.

Honestly guys, probably borderline unhealthy but great work :D

Patrick Ziegler
https://www.artstation.com/patrickoziegler


Stijn Van Gaal 
https://www.artstation.com/stijnvangaal 


Rasmus Kristensen
https://www.artstation.com/bagner


Really well done guys, insane amount of work and care put into these :) Super happy for you guys and I hope it opens new opportunities for you :)

Legacy Project Progress

As for my own progress I've been in somewhat hiatus lately, been a bit overworked but I'm still trying to do something while I'm waiting. I find making stylized materials much harder than making realistic materials for some reason xD It's all very tricky to get right especially since most of my project is relying on Gradient Mapping, I end up having to really rethink my approach on how to handle Albedo-Colors. These I have here are just the colors I use for previewing.

I've been updating my materials and especially the "crack-logic" or whatever you would call it for my tiled-stone materials in Substance Designer.


The cracks have been mostly worked on to make them feel more stylized and suitable for the type of art I'm making.


But I've also started building my desert-region buildings and it's all going well so far. Very slow and steady progress, don't want to rush things and I'm trying to remind myself to have fun doing it as well. There was some times there where I kept thinking about my project more as work rather than a fun side-project.

The start of the Desert Region Buildings

This is the color scheme I'm currently going for this region.I want the water to be greener generally than what it is in the grasslands, I want this orange nice color contrasting with the blue skies. As well as redder looking base-wood colors.

Right now I'm just spending more time developing the base-module shapes I want to be using for these style type buildings.  Right now the building designs are very inspired from the mud-type buildings you find in Africa.

After that I'm going to add more detail, more wooden beams, tarps, decal shapes etc. I also want to infuse more fantasy into them but for now I'm quite happy with how they're turning out...

Oh well, until next time!

Warping out!

/Chris Radsby

Creating a Series Pt 12 - Landscape Grass Coloring + Questions

Making Of / 27 March 2019

Hello!

These last few weeks have been full of procrastinating (no shame): The Division 2, Devil May Cry , Sekiro.
A bunch of good games have come out so I've spent even less time working on my project and even then it hasn't been that much in the way of art but organizing and doing technical stuff which I'll talk about below!


Legacy Project Progress

This week I've been setting up a new region in World Composition, it'll be the desert region that I've been wanting to work on. So I've been properly setting it up and doing all the preperation work with folder-structure and shader-structure to get it up and running. Sadly I don't have anything super fancy to show.


So , I've been thinking about ways of coloring my grass more dynamically. The current way I'm doing it is by using a terrain color texture that the grass is sampling from. However I wanted a workflow that would take my Landscape Material Painting in my so I decided to try out a thing:


Landscape Painting Render to Texture

Here you can see the material painting being painted straight onto the texture that the grass later will sample colors from.


The grass (wavy, blurred area) is picking up the landscape materials colors perfectly


So even with this working, what are the main pros & cons?

Texture Sampling

PRO - Cheaper & More efficient to use a static texture

PRO - Texture Resolution is very true to the texture itself (ie the quality from texture to color sampling is detailed)

CON - Not dynamic at all, would have to export a texture for the whole landscape every time I want to see change


RenderTarget Sampling

PRO - It's all dynamic in real time

PRO - Works with any color pickup sampled from any of the materials I paint on the terrain

CON - Even at the same resolution as the static texture somehow the detail doesn't come through. This is important to me because I rely on having a colored noise in my grass colors so that you can see individual clusters of grass.

CON - Performance , it's quite expensive to do on every frame while you're working. Higher resolution textures are real VRAM hogs as well so using bigger resolutions you might end up crashing or have crazy slow-downs.


Static Texture Color Sampling - Showing that it picks up even the smallest changes in the texture.


Landscape Render2Texturer Sampling - Has the same resolution as above texture, but yet, ends up not being very detailed at all. 

(Maybe I've missed something here, I'll keep looking at it)

Summary:

Even though it's super neat to have it real-time and it picks up colors from any material I paint. I find that the lack of detail in the texture is annoying me since I don't get the same quality. That said, for other projects that have more detailed textured grass it would benefit them a lot to use a Render2Target texture for the whole terrain for dynamic color pick-up.


Questions

So I thought I'd spend one of these blog-posts answering some of the questions I've been getting. So If you have any questions please let me know and I'll try to answer them more in detail in future blog-updates!


Why do you only keep showing one time-of-day setting?

The main reason I keep showing one time-of-day or one weather setting is that I don't really feel the need to explore different times of days yet. I'm approaching this project like I would creating a full-game. Time of Day & Weather is pretty far down the list for me.

That said, I have time-of-day working in game currently, I don't have weather and if I were to show it I would actually want to implement a system for it rather than actually just faking everything which I usually do for portfolio pieces.

What texturing software do you use?

I use mainly Substance Designer/Painter and Photoshop. My texturing needs are quite light, I've never really felt like I need to expand my texturing to Zbrush. It does happen from time to time though but I try to stay away from it since it's severely hampering production times.


Teach me senpai!?

Ehm, I'm still learning as I go myself xD I do run a mentorship with The Mentor Coalition where I teach artist what I think they need to focus on to up their game. So far it's been very successful and I've seen my mentees start making art at a higher level.


Oh well, until next time!

Warping out!

/Chris Radsby


Creating a Series Pt 11 - Art Stream

Making Of / 18 March 2019

Hello!

So I decided to spend some time during this weekend streaming my art and recording my process in how I sometimes approach making new composition. I also know that some people have been interested in how I approach things generally.


So here is the 2h Stream from Saturday where I create a new area from scratch.  I wanted to create a more interesting area for my grassland cottages to be in, something more iconic so I decided to go ahead an just try to make a new area quickly and for fun. In my head I want the grasslands to like be this huge grassland area, with cliffs, water and waterfalls that leads into deeper crevices in the earth.

First section of the stream is silent before people asked me to enable my mic* 

I think the most important thing about the whole thing is that even though I'm re-using all of my props the composition & the space is what will be saved down the line. Cliffs, trees, grass, waterfalls etc all of it is bound to change at some point when I get more assets into my project.


Process broken down

- At first I create the initial setting for my environment, I think about what kind of environment/space I want to create. In this particular case I wanted a somewhat circular space with waterfalls running down the sides of it.  So I start just sculpting out the space quickly just to get a feel for it, then immediately I plop down a character in there to get a better sense of scale.

- After that I create a camera on a location that seems suitable. Not thinking too much about it , I'm just plopping one down and start structuring things around it.

- After that I tend to use my own specific composition techniques to figure out how I want to place stuff initially. As far as I know I'm probably the only one who does this. I use a red block shape from Unreal, that I scale to lines and start putting it around the scene. First I do it in 2D-space and then after that I do it in 3D-space as well. After I've figured out my basic guide-lines I tend to plop down placeholder objects at the interesting points of the composition.

It's worth mentioning that my project currently only relies on a few objects until I've made/designed more assets but I didn't want that to be a blocker for me trying to figure out a cool new location.

I currently only have

  • 1x Tree
  • 3x Flowers
  • A Couple of rocks & cliffs.
  • Water + waterfalls.

I always try to make the best with what I have, so that I later on I can revisit the area, and do more polished passes so not all areas look the same. Sometimes you just want to create areas without constantly worrying about not having the assets to make it happen. So I use what I got :)


So here is my progress from my stream, the work I did whilst talking to the viewers about my process, going through the steps mentioned above.
Looking back now I realize that I really like a lot of the stuff that was happening in the NR 4 picture. So I'll probably go back later, create another camera that more lines up with what I had around nr 4 and start from there.

This doesn't mean that the progress from 5 or 6 will be deleted, it just means that I can move my camera back to the nr 4 position and make sure I create something from that angle that suits the composition.

Something I've learned that I didn't actually know about


So even though I make my own composition guidelines in I realized that UE4 surely must have their own, but I didn't know where to find em. Turns out you can enable a Cinematic Viewport and enable the composition gridlines for yourself! So looking above in my shot, you can tell that my center is actually off-center by a little bit. Which means, I will to pan my own camera a bit to the right to actually be in the center of the shot. 

I've previously figured out the center by using photoshop and also by cropping my shots before and now I just feel silly.

Who knew? Now we know :) and I honestly wish I knew this earlier as well.


So this is the shot with a corrected center and some tiny more work done to it right after the stream. Later on I will probably refine this into something that looks more visually interesting, but right now to keep myself a bit more motivated I'm going to move on to a new Biome.


Oh well, until next time!

Warping out!

/Chris Radsby

Creating a Series Pt 10 - Going backwards

Making Of / 11 March 2019

Hello There!

The last couple of weeks I've been going back and forth from doing temple-assets (which I'm not all that happy with) to working on the Grassland village assets that I currently have, but before moving further I wanted to start setting up my project for the future. 

So I had to take several steps backwards and implement World Composition in UE4 for my project.

World Composition basically let's you have one master level and then load in other levels into the master level to work on them. The Sub-levels are regular levels and can have terrain in them. Before I was working on one huge 8k map, using 1 landscape. Now I'm working on four 4k levels that represents different regions of the game, all of which have their own Landscapes and props in their levels.

I've actually gone backwards in terms of quality since I lost some work trying to set this stuff up. I've lost:

  • All vegetation painting
  • All terrain material painting

All in all it hasn't been so bad, at least now it will at least allow me to actually work on different areas / levels without having to load everything at once and if I decide to sometime in the future collaborate with someone it'll make it easier to divide the project into different sections you could potentially develop. That said, it also gives me a bunch of other things that are good, like if one level somehow ends up becoming corrupted I don't lose all of it and hopefully, it'll be easier to restore, but who knows? That stuff is currently beyond my knowledge working with production workflows in UE4 sadly.

After spending some more time thinking about things I decided to skip the temple-stuff for now and re-double my focus on the grassland huts. So I started making some more small props for the huts.

This time around I was trying to make use of the textures I already had to make some tree-stumps. The villagers being mostly foresters end up using a lot of wood for most of their craft thus I felt like it was appropiate to also make these stumps, an axe and some logs to boot.

After that I spent some time during the weekend making Fog Particles, these are currently huge sprites but I'm considering another approach that would potentially allow me to do something nicer looking but also cheaper. One issue that I'm currently getting in UE4 is depth-sorting issues when these translucent particles are ontop of the water that I've currently have got going. 

The solution to the problem was to set the Translucent Sort Priority in each particles detail tab to a value higher of 0 (since default value is 0). This made it so that the fog/clouds will always render ontop of  everything else generally. It's something to keep in mind for the future!


I've also spent some time making fire particles based on the Rime-stuff that Simon Schreibt posted. Very handy and seems generally super cheap.

Other News

In other news my latest source of inspiration comes from the Animé; Made in Abyss.
Beautiful background work and some lovely mysterious placing to explore which speaks directly to what I'm actually currently doing in my own project. I can't help but to look at some of this and go: this is exactly the type of stuff I want to do.

I guess that's it for now, I've been considering moving onto another area for a bit but I'm pondering if it's a good idea or not.
Oh well, until next time!

Warping out!

/Chris Radsby